Find an object that you want to print
You can download something from Thingiverse, Pinshape, Thangs, All3DP etc., or create it using Tinkercad, Sketchup, or OpenSCAD.
Decide what colors to choose
Follow this link https://lmlibrary.org/3d-filament-colors/ to see a list of the filaments the library currently has.
Create an account
Patrons can create their own free accounts and import the settings for the library’s 3D printer into their account. Go to https://canvas3d.io/projects to register for an account.
Import Settings
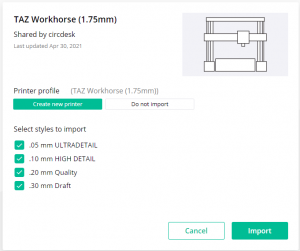
- After registering, follow this link https://share.canvas3d.io/printers/e84c2415a2c7133f870160f0d327607e to import the printer settings for the library’s Taz Workhorse 3D printer
- Select Create new printer below the words Printer profile
- Check each checkbox next to the list of styles. You will need to scroll down to see them all.
- Select Import
Setup the Printer
Now that you’ve imported the printer settings, you’ll need to setup the printer.
- Select the 3 lines in the upper left corner of the screen to see the menu.
- Select Setups then select New Setup
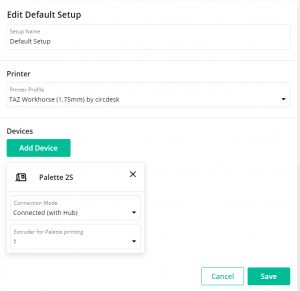
- Click the Printer drop down and choose “TAZ Workhorse (1.75mm) by circdesk”
- Select Add Device
- Choose Palette 2S from the drop down list
- Connection Mode – Connected (with Hub)
- Select 1 Extruder
- Select Save
Start a New Project
Go to the  menu in the upper left corner of the screen and select New Project to get started.
Add Models
Your screen will be mostly blank. Click Add models in the upper left corner of the screen to upload a 3D print file to your project.
You will have two options – “Drop Single Material Models Here” and “Drop Multi-material Models Here”. Choose “single material models” unless the file(s) you have to print is a special multi-material file. Either drag and drop your files or click the plus sign to upload. Be sure to extract any zipped files before uploading them.
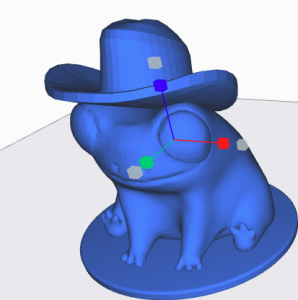
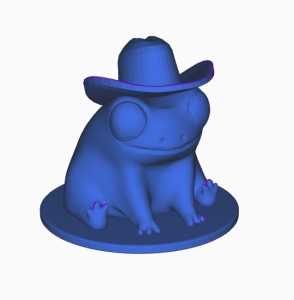
For this example, we are using Fred the Cowboy frog which can be downloaded from Thingiverse.
Change Your View
Use the mouse to alter your view of the object.
- Use the scroll wheel to zoom your view of the screen in or out
- Left click the mouse on the print bed, hold and drag to change your angle of view
- Right click the mouse on the print bed, hold and drag to move the print bed around on your screen
Toolbox
You will see your toolbox on the left side of the screen. First select your object, then click something from the toolbox. Hover over each option to see what they are.
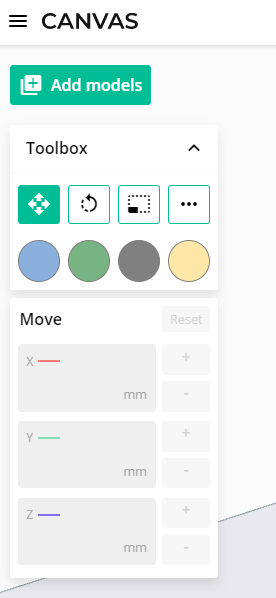
 Move: Move your object on the bed
After you have selected your object and selected move, you can move your object one of two ways:
- On the toolbox menu, use the plus and minus signs beside the X, Y, or Z to move your object up, down, or side-to-side. You can also type in exact coordinates.
- On your object, use the red arrow, green arrow, or yellow box that appear after selecting move to move your object forward, backward, or side-to-side.
Use the Reset button to undo your changes.
 Rotate: Rotate your object in any direction
After you have selected your object and selected rotate, you can rotate your object one of three ways:
- On the toolbox menu, use the plus and minus signs beside the X, Y, or Z to rotate your object in any direction. You can also type in exact degrees of rotation.
- Click the X, Y, or Z listed below the word Mirror to get a mirror image of your object.
- Use the red, green or blue circle that appear on your object after selecting rotate to rotate your object in any direction.
Use the Reset button to undo your changes.
 Scale: Change the size of your object or see the current size of your object.
After you have selected your object and selected scale, you can change the size of your object one of two ways:
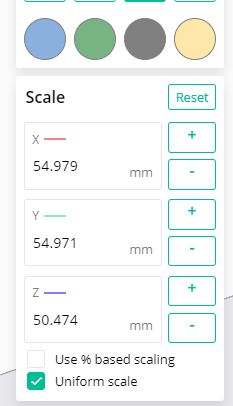
- On the toolbox menu, use the plus and minus signs beside the X, Y, or Z to change the scale of your object. You can also type in the exact size in millimeters.
-
- Leave the “Uniform scale” checkbox checked unless you want to deform your object (make it tall and thin or short and wide)
- Check the “Use % based scaling” check box to see what percentage of the original size your object currently is. Uncheck it to show the current size in millimeters.
- Use the gray boxes that appear on your object after selecting scale to change the scale of your object.
-
- If you use the red, green, or blue boxes, it will deform your object (make it tall and thin or short and wide).
Use the Reset button to undo your changes.
 More
More
Auto-arrange – If you have more than one object on the bed, this will rearrange them on the bed
Lay face to bed – Use this to flip your object. Select Lay face to bed, then click a spot on your object that you want to be touching the print bed.
Drop models to bed – sets your object down onto the print bed if it is hovering over the print bed.
Configure custom supports – use custom supports instead of automatic standard supports.
Remap inputs – correct errors by remapping sections of the print. This will force it to use the selected input (color)
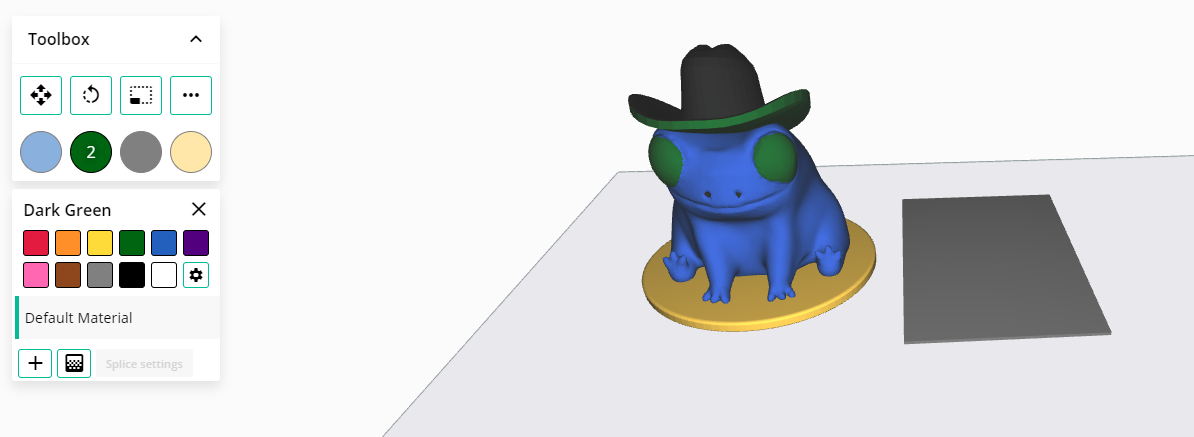
Colors
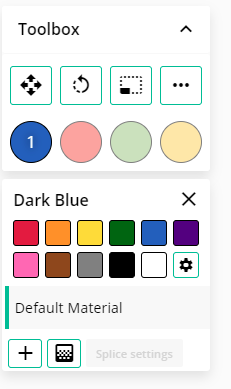
The four colored dots represent the four inputs or different filaments that you can use for your 3D print project. The first color is selected automatically for your entire object. You can choose as many as four different colors to add to your 3D print project or as few as two colors.
Select a color to change it. Select the gear to see more color choices. It is a good idea to make the color here be as close as possible to the color of filament you will actually use.
Settings
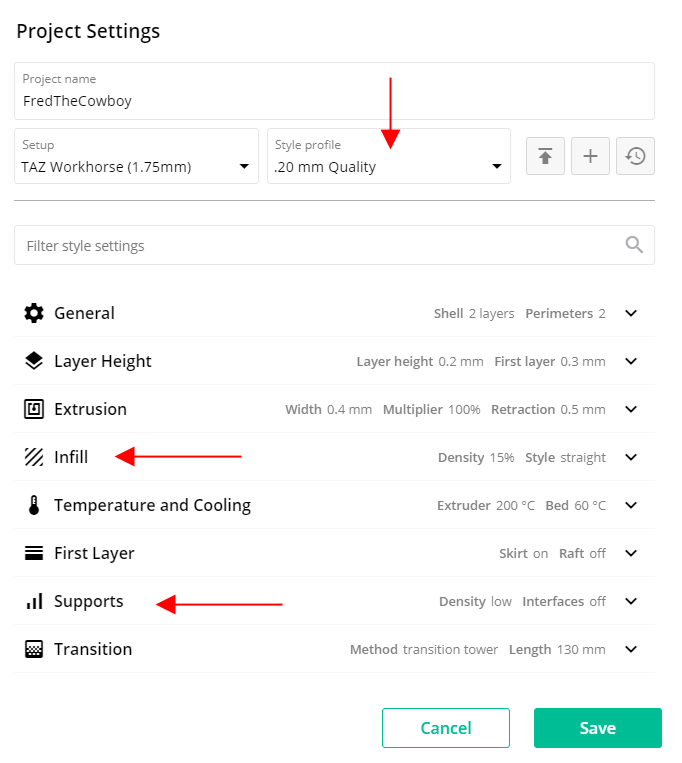
Near the top right corner of your screen, there is a link to your project settings. These are the settings that we imported earlier for the library’s Taz Workhorse 3D printer. Some of these settings should be left as they are, but some settings can and should be changed depending on your 3D print job.
Style profile
- Use 0.30 mm Draft if you want it to print quickly and it doesn’t need to be pretty
- 0.20 mm Quality will work for most jobs
- 0.15 mm Detail for more detailed prints (it will take longer to print than .20 Quality)
- And so on up to 0.05 mm Ultradetail. This setting would work best for small detailed prints.
Infill
Change the infill density percentage to make your object more or less solid. 0% would be hollow – 100% would be solid.
Most projects can be printed with 10-15% infill. Very small and delicate projects might benefit from more infill. The greater the infill, the longer it takes to print.
Supports
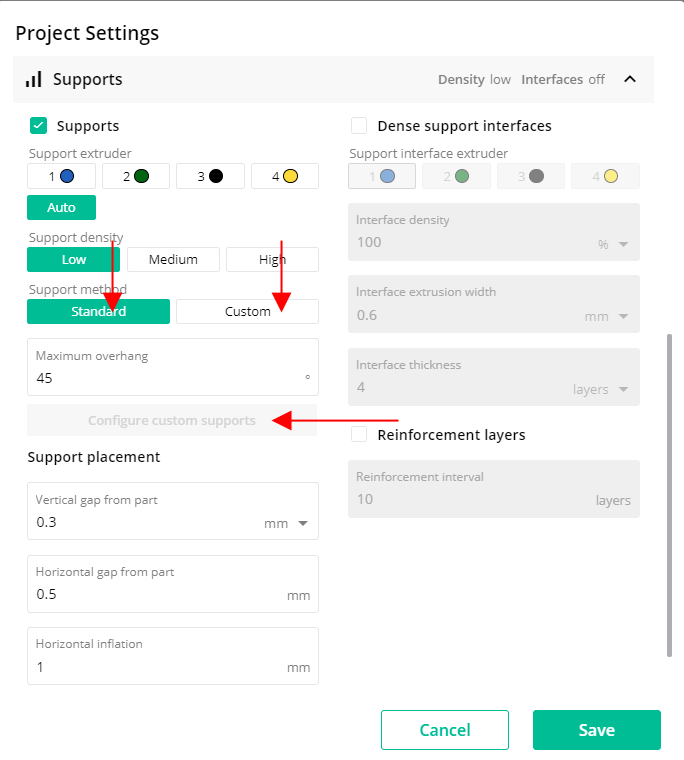
You can leave it at Standard support to have it automatically generate support where needed, or you can paint on custom supports. The standard support works well for most objects.
You can also change the degree of the Maximum overhang. The maximum overhang is the angle at which it will add support to your object. 45 degrees is standard for most printers.
To use custom supports
-
- Select Custom
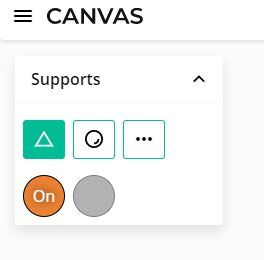
Then select Configure custom supports- Select the orange On button to paint where you want support to be on your object.
- Select the gray Off button to erase support from your object.
- Select More to auto-generate support that you can later edit.
- Select Custom
Objects
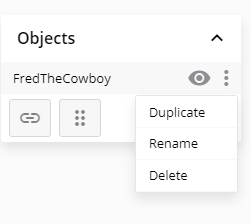
Below Settings on the upper right side of your screen, Objects give you a list of the objects currently on the print bed. Hover over the name of an object to see options. Here you can duplicate, rename, delete, or hide an object.
Paint
After you select your object, you will see the options to Paint selected and Slice in the lower right side of the screen. Choose Paint selected to switch to the paint screen. The Paint toolbox will replace your regular toolbox. By default, your entire object will start out painted the #1 color (blue)

 Facet
Facet
The facet tool paints precise triangles. Click your left mouse button and drag across the part of the object that you want to paint.
 Sphere
The sphere tool is less precise but can cover larger areas. Use the slidebar to make the tool cover a larger or smaller area. Click your left mouse button and drag across the part of the object that you want to paint.
 Fill
Fill
Fill will change the color of an entire object (or region if you have created regions)
 Stamp
Stamp
Use to stamp an uploaded image onto your object. You could use this to add a logo to an object.
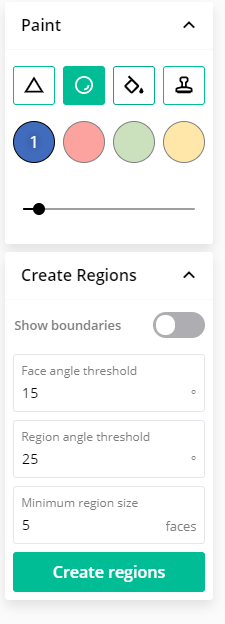
Create Regions
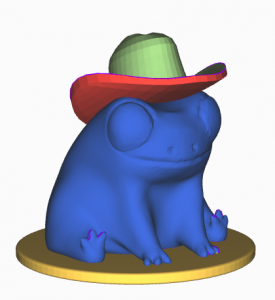
When Sphere or Fill are selected, you have the option to create regions on your object. This will allow you to set the color of different sections of your object much more quickly. You can use the default settings and select Create regions.
When I selected Create regions for Fred the cowboy, it made the base he sits on one region, his body one region, the top of his hat one region, and the bottom of his hat another region. However, it included one of his toes as part of the base, so it may not work perfectly every time.
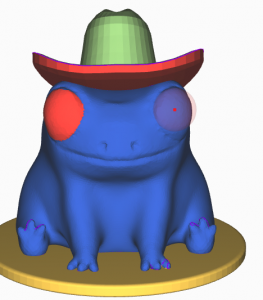
Manual Painting
Fred’s eyes were not automatically created as separate regions from the rest of his body. If I want his eyes to be a different color, I will have to paint them manually using Facet or Sphere.
-
-
- Select the color you want to use – I’m using red.
- Select the tool you want to use – Sphere would work best for his round eyes.
- Use the slidebar to make the sphere about the same size as Fred’s eye.
- Change the angle of your view by clicking and dragging in the whitespace, so you can see what you are painting.
- Left click the mouse on the area you want to paint. You can also click and drag to cover a larger area at once.
-
When you are finished painting, click Save and return at the lower right of the screen.
Now you are back to the main screen.
Changing colors after painting
If you decide you want to change the color of an area that you’ve already painted, you can do that now by changing the color of the filament represented by the four dots. I changed the #2 color from red to dark green and the #3 color from light green to black.
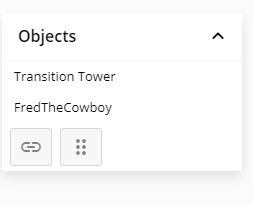
Transition Tower
The objects part of the screen now includes a Transition Tower. When the 3D printer changes colors (filaments) from the yellow base to the blue frog body, it has to purge filament so that the body will be the correct color, instead of a mix of the two colors. It creates the transition tower with this filament. The tower will be as tall as the last color change, the top of Fred’s hat in this case.
If we only had two colors, a yellow base and an entirely blue frog, then the transition tower would only be as tall as Fred’s toes.
The more filament transitions in a project, the larger the tower. A large tower uses more filament and costs more.
Getting Ready to Print
Slice
There will be a Slice button on the lower right corner of your screen. After all of your changes have been made and you are ready to print, click Slice.
Sometimes the button is labeled Preview instead of Slice, if you have already sliced your object before.
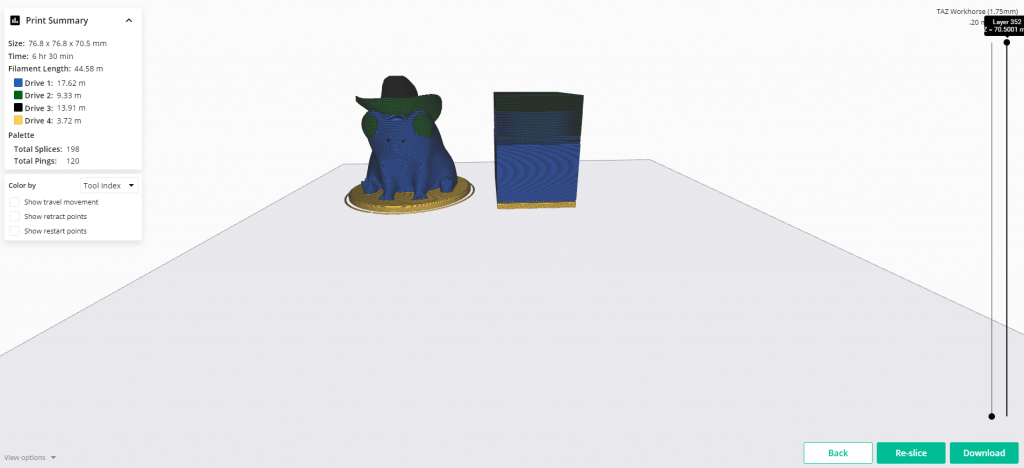
After you select slice, you will see a screen that looks something like this:
View Layers
If you move the black dots on the right of the screen up and down, you can see the different layers of the object and how they would print.
Print Summary
The information at the upper left corner of the screen tells you
-
- The size of your object
- Estimated printing time
- How much filament will be used total in meters
- How much of each color of filament will be used in meters
The total filament length is what we will use when charging for 3D printing. Please take a screenshot of the Print Summary and send it to us when you fill out a 3D print request form.
Download
If you are satisfied with the results, then click Download in the lower right corner of the screen to get a file that can be sent to our 3D printer.
Comparison to a Single Material Print
This file, which is about 3” x 3″, would cost $13.35 and take 6.5 hours to print. Printing the same file as a single material print (all one color) would cost $4.91 and take 4.5 hours to print.
How to Videos
Here a few YouTube tutorial videos. They are a little out of date, but they are useful for giving a better understanding of how painting in Canvas works.
- Painting in CANVAS – Getting Started https://www.youtube.com/watch?v=xTAKoZZA_dQ
- Painting in CANVAS – An In-Depth Look https://www.youtube.com/watch?v=uRMUCCEz-Ds&t=97s
- Stamping with CANVAS – 3D Printing Color Images and Graphics https://www.youtube.com/watch?v=rrb-Zn0iLdQ&t=12s
View more videos on the Mosaic Manufacturing YouTube channel https://www.youtube.com/c/MosaicManufacturing/featured