PrusaSlicer works well with our Taz Workhorse 3D printer to print single material (all one color) 3D print projects.
Download PrusaSlicer
If you haven’t already installed PrusaSlicer, you can download it at https://www.prusa3d.com/prusaslicer/. Choose the Windows PrusaSlicer Standalone version and leave the installation settings as is, to install only the necessary files for running PrusaSlicer on a Windows machine.
Downloadable Settings
We have created a settings config bundle that you can use to import settings into your PrusaSlicer installation. This will save considerable time setting up and insure that your 3D print files will be compatible with our Taz Workhorse 3D printer
Follow the link to find a zipped file stored on google drive file for the config bundle. Once there, download ![]() the zipped file. Open the downloaded file and extract it.
the zipped file. Open the downloaded file and extract it.
When you open PrusaSlicer for the first time, it will bring up a configuration wizard. If you want to use our config bundle, you can cancel the wizard and follow these steps instead:
- Go to File in the upper left corner of the screen,
- then Import,
- then down to Import Config Bundle
- Find the PrusaSlicer_config_bundle that you just downloaded and select it
- A window will pop up stating “12 presets successfully imported”. Click OK.
This will preset the settings for the Print Settings tab, the Filament Settings tab, and the Printer Settings tab.
Find a Project to Print
You can find ready to print projects online at sites like Thingiverse, Pinshape, Thangs, All3DP etc.
Or you can get started making your own designs with the help of sites and software like: Tinkercad, Sketchup,, OpenSCAD
Choose a Color
You can find a list of Liberal Memorial Library’s current filament options at – https://lmlibrary.org/3d-filament-colors/
Import File
Import your file into PrusaSlicer. You can do this three different ways:
- Using a Keyboard shortcut: Ctr + i
- Use the File Menu: Go to File, then Import, then Import STL/OBJ/AMF/3MF…
- Use the Top Toolbar
 The first tool on the toolbar will import files.

Change your angle of view
Use the mouse to alter your view of the object
- Use the scroll wheel to zoom your view of the screen in or out
- Left click the mouse on the print bed, hold and drag to change your angle of view
- Right click the mouse on the print bed, hold and drag to move the print bed around on your screen
Axis
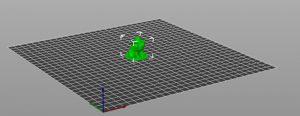
The arrows at the lower left of the screen show your where the lower left of the print bed (the starting point) is
The Red arrow indicates the X axis (width of your object)
The Green arrow indicate the Y axis (length of your object)
The Blue arrow indicates the Z axis (height of your object)
Plater tab
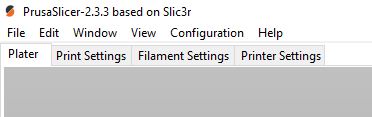
The Plater tab is the main tab that you will use in PrusaSlicer. The other tabs are for changing and viewing settings.
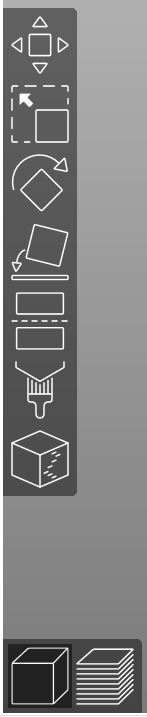
Top Toolbar
Using the Top Toolbar you can:
![]() Add: Use this to import files (objects).
Add: Use this to import files (objects).
![]() Delete: Remove the currently selected object.
Delete: Remove the currently selected object.
![]() Delete All: Removes all objects from the print bed.
Delete All: Removes all objects from the print bed.
![]() Arrange: Automatically rearranges the objects to fit on the print bed.
Arrange: Automatically rearranges the objects to fit on the print bed.
![]() Copy: Copy the currently selected object.
Copy: Copy the currently selected object.
![]() Paste: Paste whatever you just copied.
Paste: Paste whatever you just copied.
![]() Split into Objects: With some files, this can be used to split the object into multiple parts or objects. These parts can then be exported as individual files.
Split into Objects: With some files, this can be used to split the object into multiple parts or objects. These parts can then be exported as individual files.
![]() Search: Used to search the settings.
Search: Used to search the settings.
![]() Variable Layer Height: Lets you define different regions of your object to be printed with a different layer height and automatically smooth the transition between them.
Variable Layer Height: Lets you define different regions of your object to be printed with a different layer height and automatically smooth the transition between them.
 Undo/Redo: Left click to undo or redo the last action, or you can right click to undo/redo multiple steps at once.
Left Toolbar
There is another toolbar on the left side of the screen. First select your object to get the toolbar boxes to light up. Hover over each box to see what they do. Some of the items on this toolbar will only show if you switch to Advanced Mode.
 Move: is automatically selected when you first import an object. Left click on the object and drag it to move to another position on the print bed.
 Scale: You can use this to change the size of your object. Also, if you want to change the proportions of your object (make you object taller, shorter, skinnier, or thicker) you can do that here. Click and drag one of the orange boxes to make your object larger or smaller. Use the red, green, or blue boxes to change your objects proportions.
 Rotate: Rotate your object by clicking and dragging one of the red, green, or blue boxes in any direction.
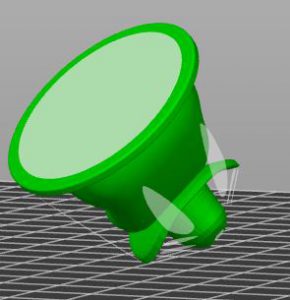
 Place on Face: If you think your object would print better if it were positioned differently, you can use Place on Face to quickly reposition your object. Select the white oval on the side of the object you want facing down.
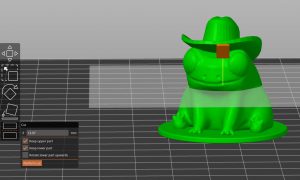
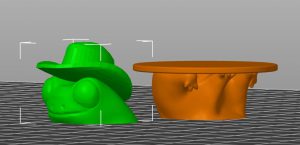
 Cut: Use this to cut your model into two pieces. Adjust the position of the cut plane by either dragging the orange box up or down or by typing in the exact value in millimeters. You can choose to only keep the upper part, only keep the lower part, or keep both parts.
If you have an object that is too tall for the print bed, you can use Cut to print it one half at a time. You can also use Cut to remove a part of the object that you don’t want to print. This YouTube video gives a good example of using Cut.
View
There are two viewing options: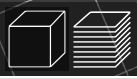 3D editor view (the view that you start with) and Preview (the view you see after you slice your object).
Once you have sliced your object by clicking Slice now in the lower right corner of your screen, you can flip back and forth using the cube (3D editor) and stack (Preview) at the lower left corner of your screen.
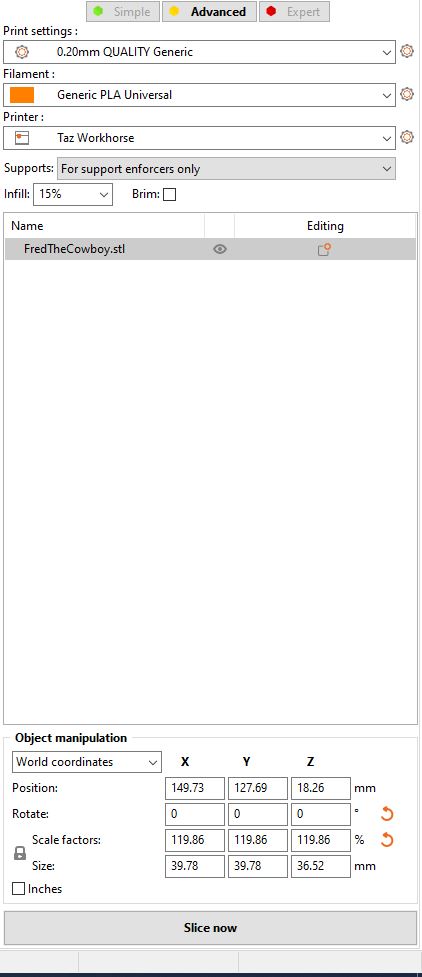
Change Settings
On the right side of your screen, you will see settings that you can change. These are the settings that we imported earlier. If your object is currently selected, it will also show you how large your object is and its position on the print bed.
Modes
You can choose between three modes
- Simple: Shows you only the basic options
- Advanced: Shows you all of the options on the editor screen
- Expert: Shows you all of the options on the editor screen and shows you all of the options in the settings screens. You probably will not need Expert mode.
Print settings
Print settings lets you choose between preset print settings. These settings were included in the config bundle we imported earlier. The numbers indicate how thick the layers are. The smaller the number, the more layers there are making up the object. Prints with more layers look better but take longer to print.
- Use 0.30 Draft for a quicker finishing time, but a rougher looking 3D object.
- 0.20 Quality will work for most jobs
- 0.15 Detail takes longer to print but works well for more detailed objects.
- And so on up to 0.05 Ultradetail. This setting would work best for small detailed objects.
Filament
Use this to select the kind of filament you will use. You can leave it at Generic PLA Universal. All of the filament the library currently owns is PLA. This setting will let the 3D printer know what temperature to use when printing among other things.
Printer
Taz Workhorse is the name of our printer. This dropdown will let you choose between different printer models if you have more than one printer model setup. This will format your project to the correct size and shape of the 3D printer model that you will be using.
Supports
This dropdown lets you choose what kind of supports to add to your object if any.
- None: Choose this if your project doesn’t need any support.
- Support on build plate only: Automatically adds support anywhere that the angle is less than a certain amount, but only from the build plate to your object, not between two parts of your object.
- For support enforcers only: Only adds support where you tell it to. You would use the Paint-on supports tool to add support where you think it is needed.
- Everywhere: add support anywhere that the angle is greater than a certain amount. (If you choose support everywhere, it will use more filament and it may leave rough spots on your projects after the support is removed.)
You can choose to leave the Supports setting on For support enforcers only and draw on support when you think you need it.
Infill
Change the percent of infill to make your object more or less solid. 0% would be hollow – 100% would be solid. Projects with less infill cost less and don’t take as long to print, but are more breakable. Most projects can be printed with 10-15% infill. Very small and delicate projects might benefit from more infill.
Brim
Brim can be used to add extra adhesion to the bed. It increases the surface area of the first layer, like adding a brim to a hat.
You could consider using the brim option when printing:
- Tall objects with a small base
- Multiple small objects at once
Object Manipulation
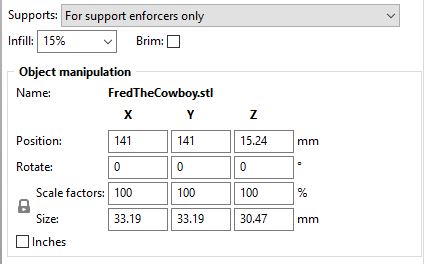
Position tells you where your object is on the print bed. You can also move your object on the print bed by typing in different numbers.
Rotate: You can type in a number here to have your object rotated by that many degrees.
Scale factors: You can use this change the size of your object. Type 50% to make the object half the original size.
Size lets you know how big your object is in millimeters. You can also change the size here.
Check the inches box to see the size in inches.
Be sure to uncheck inches before slicing your object (we want the final size to show up as millimeters)
Using Support Enforcers (Paint-on supports)
Switch to Advanced mode (in the upper right corner of your screen)
Select your object on the print bed.
 On the Left Toolbar select Paint-on supports.
Left click and drag your brush on areas of your object that you want to have support.
Right click and drag your brush on areas that you don’t want to have support.
Hold the shift button and left click and drag your brush on areas that you want to erase the marks for support.
This Youtube video shows how to use paint-on supports
https://youtu.be/6LLK9soDW88
Seam Painting
 Seam Painting lets you decide exactly where the seam will or won’t be. The seam is the place where the printer has to stop extruding for a brief moment when the print head moves up to the next layer. Generally the seams aren’t noticeable, and seam painting is not required.
Getting Ready to Print
Slice
After all of your changes have been made and you are ready to print, click the Slice now gray button in the lower right corner of your screen or click Preview in the lower left corner of the screen instead. If you have clicked Preview previously, the gray button may be labeled Export G-code instead of Slice now.
Then you will see a screen that looks something like this:
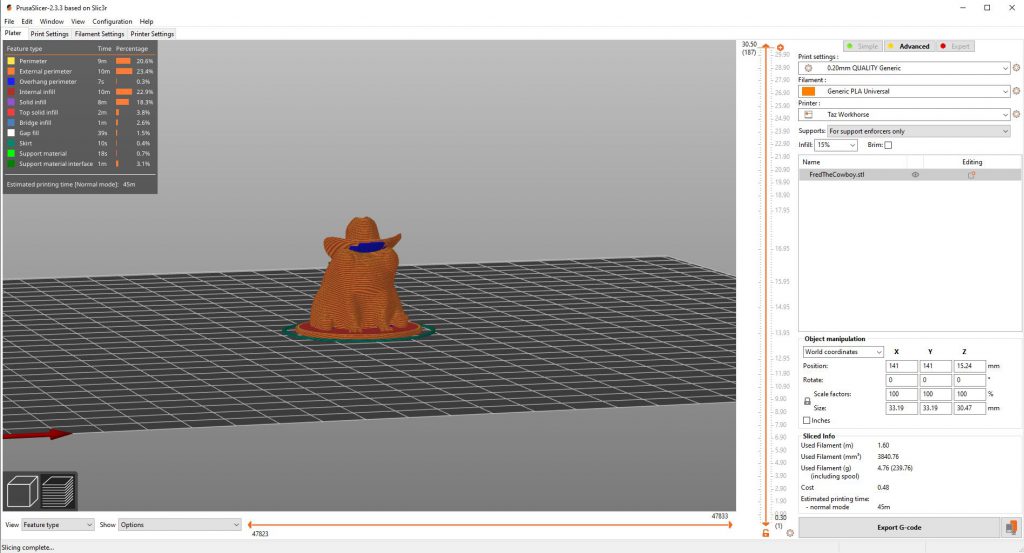
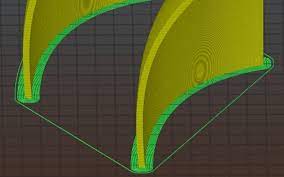
Legend
The legend in the upper left corner shows a breakdown of the print time with different colors indicating features of the object: perimeter, infill, support, etc. The blue color indicates overhang perimeter, the part of the object that sticks out and might need support if it sticks out at more than a certain angle.
View Layers
There is an orange line to the right of the 3D object. Beside the orange line there are numbers indicating the different layers of your object. If you move the orange arrows up and down, you can see how the different layers of the object would print. If you move the side to side arrow at the bottom of the screen, it shows how an individual layer would print.
Sliced Info
The information at the lower right corner of the screen, below the Object manipulation box, tells you
- How much filament will be used in meters – Used Filament (m)
- An estimated price – the library charges $0.10 per gram or a minimum of $0.50.
- An estimated printing time
This is the information we will use when charging for 3D printing. Patrons should take a screenshot of the Sliced Info box and send it to us with their 3D print request form.
Export G-code
If you are satisfied with the results, then click Export G-code to get a file that can be sent to our 3D printer.